Every homework comes with a src » test » java directory with JUnit 5 test code. You must pass all of these tests remotely to earn full credit.
The screenshots are shown at reduced size. Right-click to open the image at 100% size in a new tab (useful for reading the text).
Our TA has recorded a super helpful walkthrough if you prefer a video of these steps! You may need to login with your USF username and password for access.
Understanding Tests
Each homework will have a class called HomeworkTest.java where Homework is the name of the homework assignment. For example, for the ArgumentParser homework, its associated test class is ArgumentParserTest.java.
The homework tests use the Junit 5 testing framework, which has built-in support in Eclipse. The tests themselves are Java code. There are always several parts of a test: the test case (method being tested and on which input), the actual result of running that method, and the expected result.
For example, consider this test:
/**
 * Tests values that should be considered valid flags.
 *
 * @param flag valid flag value
 */
@Order(1)
@ParameterizedTest(name = "[{index}: \"{0}\"]")
@ValueSource(strings = {
    "-a", "-hello", "-hello world", "-trailing  ", "-résumé", "-über",
    "-abc123", "-with-dash", "-with_underscore", "-@debug", "-#admin",
    "--quiet", })
public void testValidFlags(String flag) {
  boolean actual = ArgumentParser.isFlag(flag);
  Assertions.assertTrue(actual, flag);
}
The method being tested is the isFlag method in ArgumentParser, given by this line:
boolean actual = ArgumentParser.isFlag(flag);
The method is being tested multiple times, once for each input in the @ValueSource here:
@ValueSource(strings = {
    "-a", "-hello", "-hello world", "-trailing  ", "-résumé", "-über",
    "-abc123", "-with-dash", "-with_underscore", "-@debug", "-#admin",
    "--quiet", })
For each of these input values for the isFlag method, the test is expecting the method to return true each time:
Assertions.assertTrue(actual, flag);
If we consider the first input value, then the code asserts ArgumentParser.isFlag("-a") should return true. If it does, the test passes. If not, an exception is thrown.
Each method might look slightly different, but it will always have those same three components: what is being tested, what is the actual value, and what is the expected value. If you ever have trouble understanding a test, reach out on CampusWire!
Local Testing
You should try passing the tests locally before you try passing them remotely. Before you can do that, you need to follow the setup homework guide to setup the your repository using GitHub classroom and then import that repository as a Java Project in Eclipse.
To run the JUnit tests provided with the homework template, follow these steps:
-
Open up the
src»test»javasubfolder in the Eclipse project. -
Open up the class containing the same name as the homework assignment plus the suffix
Testat the end. For example, for theArgumentParserhomework assignment,ArgumentParserTestis the associated test class. -
From the “Run” menu, select “Run As” » “JUnit Test” from the menu. If prompted which tests to run, select the one with the same name as the class. For example, for the
ArgumentParserhomework assignment,ArgumentParserTestis the associated test class. -
Running the tests should open the “JUnit” view. You can use that view to see which tests you are passing and which you are not. See the Eclipse User Guide for what each of the buttons mean in this view.
-
After making changes to your code, you can re-run the tests by following the same steps or clicking the
 Rerun Test button.
It is important you only try to pass one test at a time, because the changes you make may affect other tests. You should commit your changes every time you start passing a new test. You only need to push your changes at the end of every coding session (you can do it more often as well).
Running Individual Tests
While you are initially working on a homework assignment, you should focus on individual tests or individual groups of tests. There is no need to run all of the tests every time; in fact this can make debugging harder!
Focus on the tests in the order they are provided in the test class. Run the first group of tests in the file and focus on the first individual test that is not passing. Once that is passing, run the group of tests again and repeat the same process. It is common that fixing an issue for one test will cause other tests to pass or fail, so it is important to work iteratively and re-run the tests often.
There are many ways to run an individual JUnit test within Eclipse. Here are a few options:
-
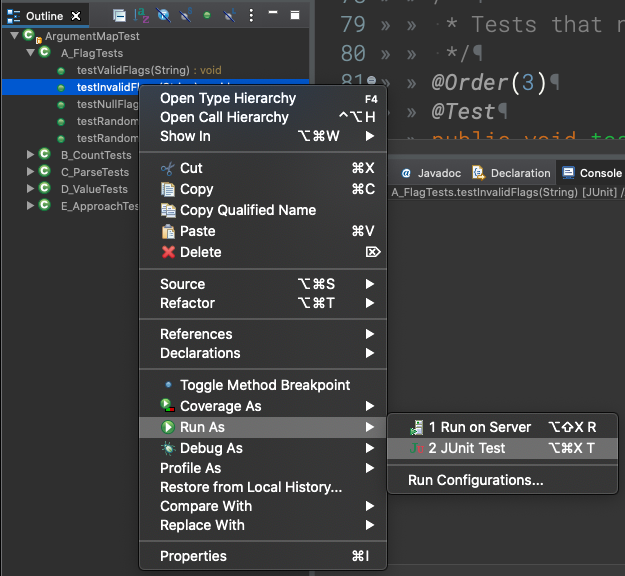
Open up the test file in the Java perspective. Find the test in the “Outline” view. Right-click the name, and select “Run As” then “JUnit Test” from the menus.
-
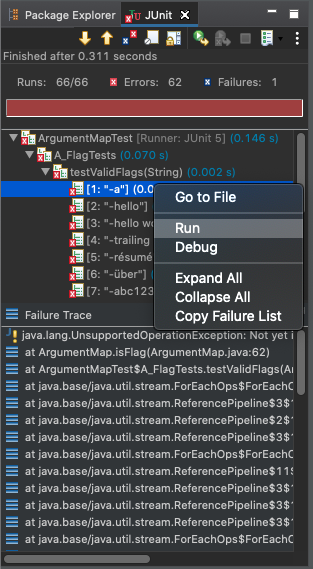
In the JUnit view, right-click the test you want to run and select “Run” from the menu. (See example.)
-
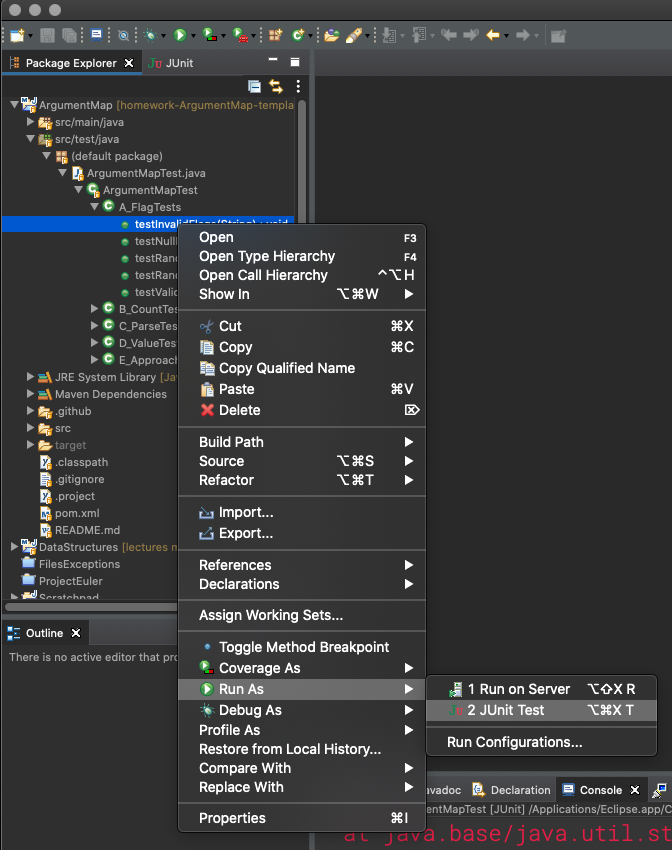
In the “Package Explorer” view, browse to the test, right-click the test name, and select “Run As” then “JUnit Test” from the menus. (See example.)
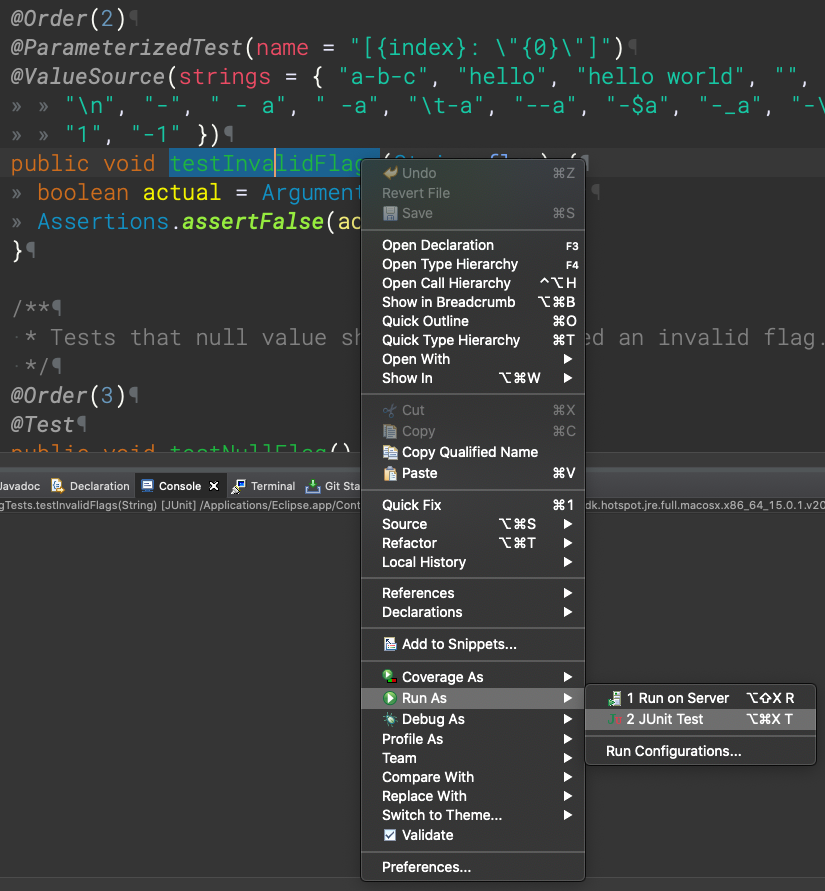
-
Open up the test file in the Java perspective. Find the test in the file. Click the test so it is the current active line in the editor. Right-click the name, and select “Run As” then “JUnit Test” from the menus. (See example.)
-
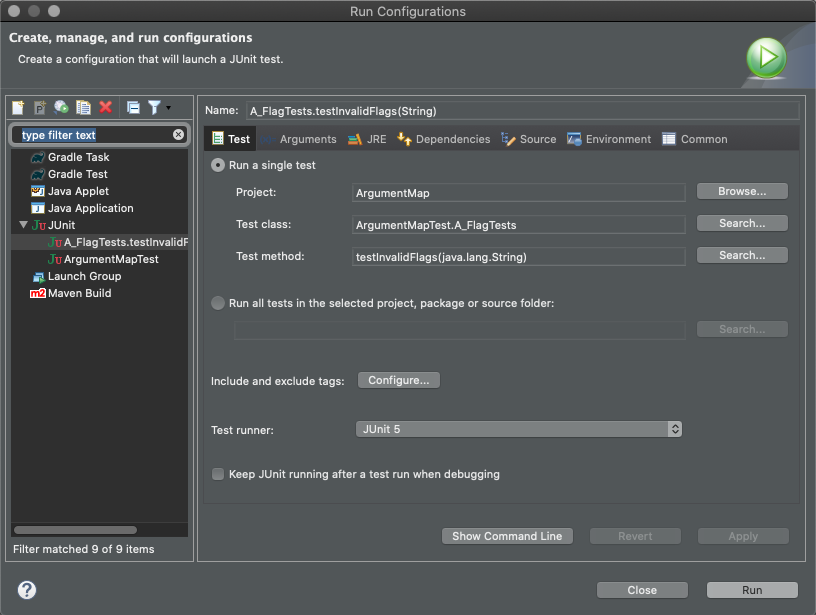
Finally, if you want to manually run a single test (or group of tests), you can modify the run configuration to look something like this:
Pretty much anywhere you can find the test and right-click it, you can run it as a JUnit test without running everything else. This process works for an individual test method or a group of tests (usually an inner or nested class with multiple test methods)!
Advanced: Running Tests via Maven
If you want to be sure there are no surprises when your code is tested by GitHub Actions, you need to run the Maven command in Eclipse. Maven is the tool being used to setup your Eclipse projects (it handles importing third-party packages and the compile settings), and it is the tool used by GitHub Actions to compile and test your code.
View Details
Most of the homework assignments assign 5 points for having warning-free code. Maven uses a different compiler than Eclipse, so you might not see the same set warnings reported in the “Problems” view of Eclipse that will be caught when Maven is run by GitHub Actions. To check for warnings, follow these steps:
-
Right-click the
pom.xmlfile, open the “Run As” menu, and select “3 Maven build…” from the menu. Make sure to select the option with the...at the end.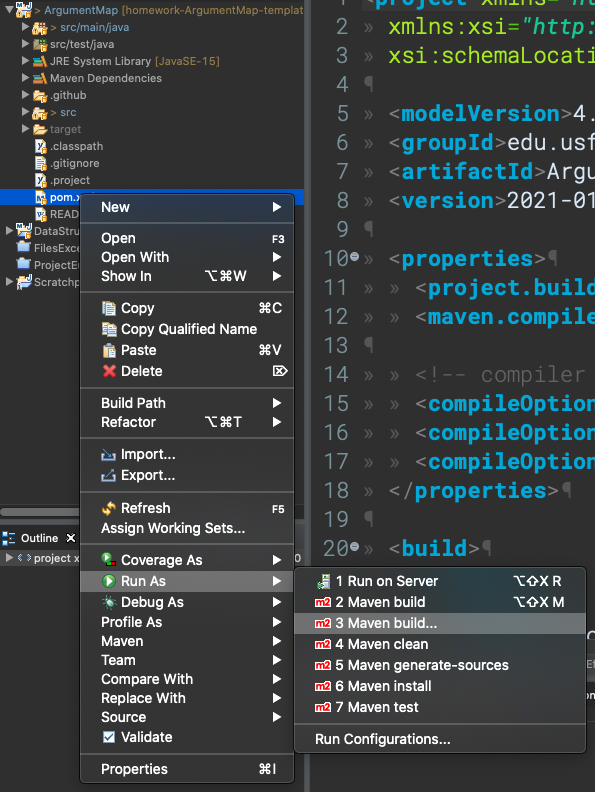
-
On the resulting popup window, make sure to enter
clean compileinto the “Goals” text box. -
Click the “Add…” button and add a parameter with name
compileOptionFailand valuetrue. This will cause the compile operation to fail if there are warnings in your code.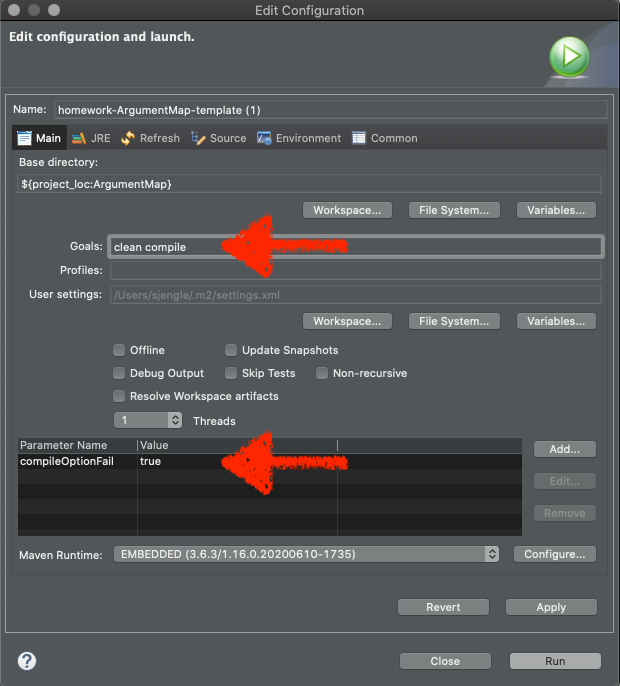
-
Click the “Run” button and inspect the console output. If you see this message:
[ERROR] error: warnings found and -Werror specifiedThat means there was a warning and your code failed to compile. If you scroll up, you should find a heading:
[WARNING] COMPILATION WARNING :…and underneath there you will find the warning messages. Fix those before moving on.
The next step is to re-compile your code regardless of warnings. Follow the same steps as above to open the “Maven build…” menu. In the popup window, make sure to enter:
-
Enter
clean compile test-compilein the “Goals” text box. (Note the addition oftest-compilethis time.) -
Make sure there are NO parameters provided.
-
Click the “Run” button and inspect the console output. Ignore the
SLF4Joutput at the start. If you see this message:[INFO] BUILD SUCCESS…then the compile was successful and you can move on to the next step. If this does not work, reach out to us on CampusWire for help.
Finally, you can run the tests as they will be run by GitHub Actions. Follow the same steps as before to open the “Maven build…” menu. In the popup window, make sure to enter:
-
Enter
testin the “Goals” text box. -
Click the “Add…” button and add a parameter with name
testand valueHomeworkTest*whereHomeworkis the homework name. For example, enterArgumentParserTest*to run all of the tests for theArgumentParserhomework.Alternatively, if you want to run one of the A, B, C, etc. test groups, enter
HomeworkTest*X_*whereHomeworkis the homework name andXis the test group (such asA,B, and so on). For example, enterArgumentParserTest*A_*to run theAtests for theArgumentParserhomework.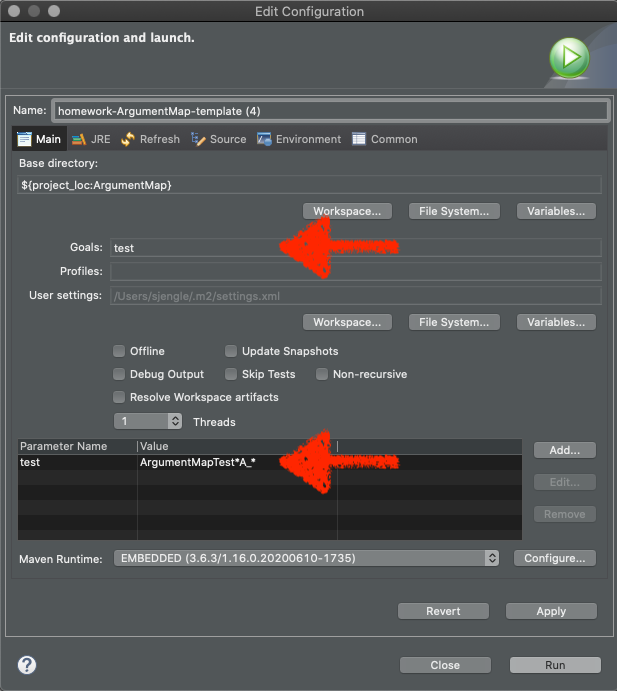
-
Click the “Run” button and inspect the console output for which tests passed or failed.
Generally these steps are only necessary if your tests pass normally in Eclipse but not on GitHub Actions. It is easier to debug the issue locally than re-run the GitHub Action multiple times.
Remote Testing
Once you are passing all of the tests locally, it is time to test your homework remotely.
-
AFTER you have made a commit and pushed it to GitHub, open up your repository on GitHub. You should be able to see the status of your commit:
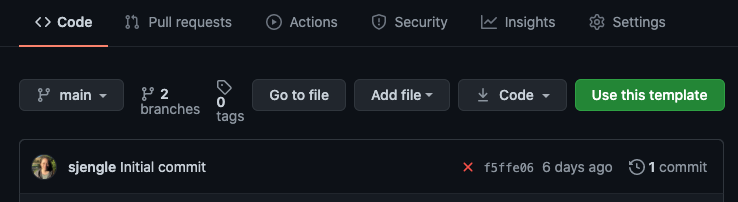
There are three icons you could see next to your commit:
- A green checkmark means the autograder ran successfully and everything passed. Nice work!
- A yellow dot means the autograder is not yet done running.
- A red “x” means the autograder ran but one or more of the tests did not pass. In this case, you’ll need to look at the details to see why.
If the autograder is still running, you can go look at the details or refresh once it is done to see the status.
-
On that same page, you should also see the number of points you are earning for the homework assignment:
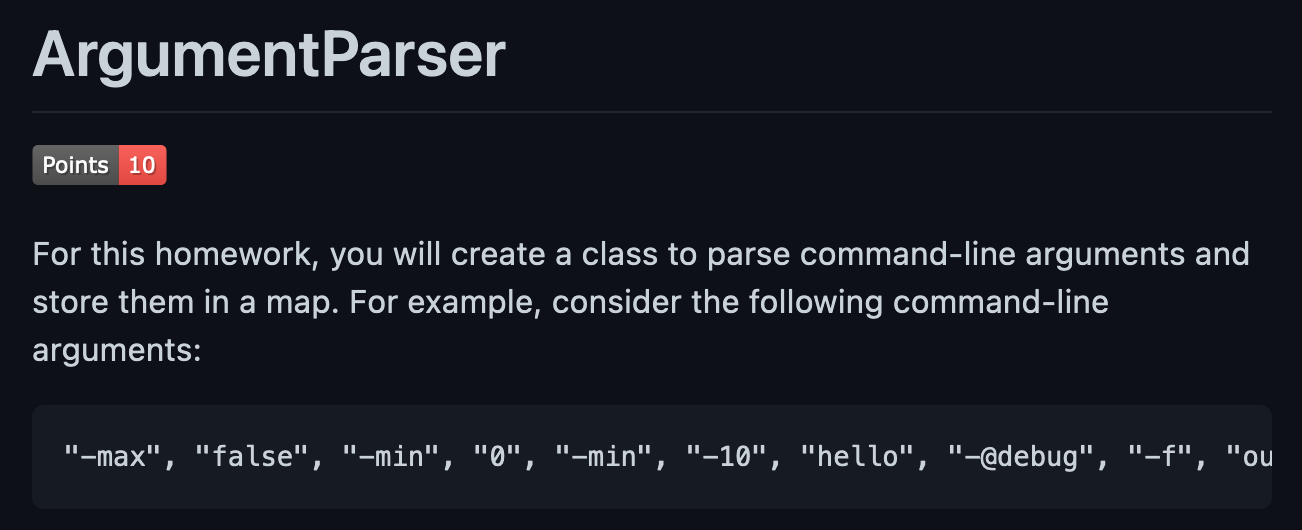
Keep in mind that the number of points displayed in your
READMEwill not be correct until the autograder is complete. If you see the yellow dot next to your commit, you’ll need to refresh theREADMEfile when it is done to see the updated value. -
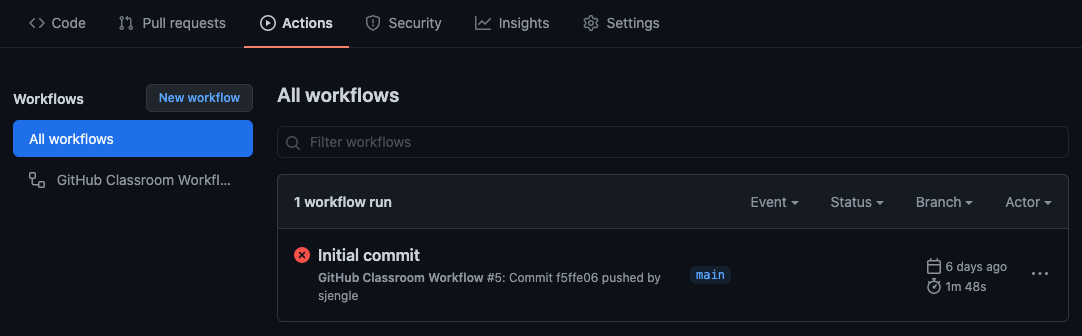
If you want more details, you have to click on the “Actions” tab. From there, you should see all of the autograder runs. Click on the latest run for details.
-
The workflow details view will show you the status of each step, but the only really important one is the “Autograding” step. You can also see the number of points warned in the “Annotations” section:
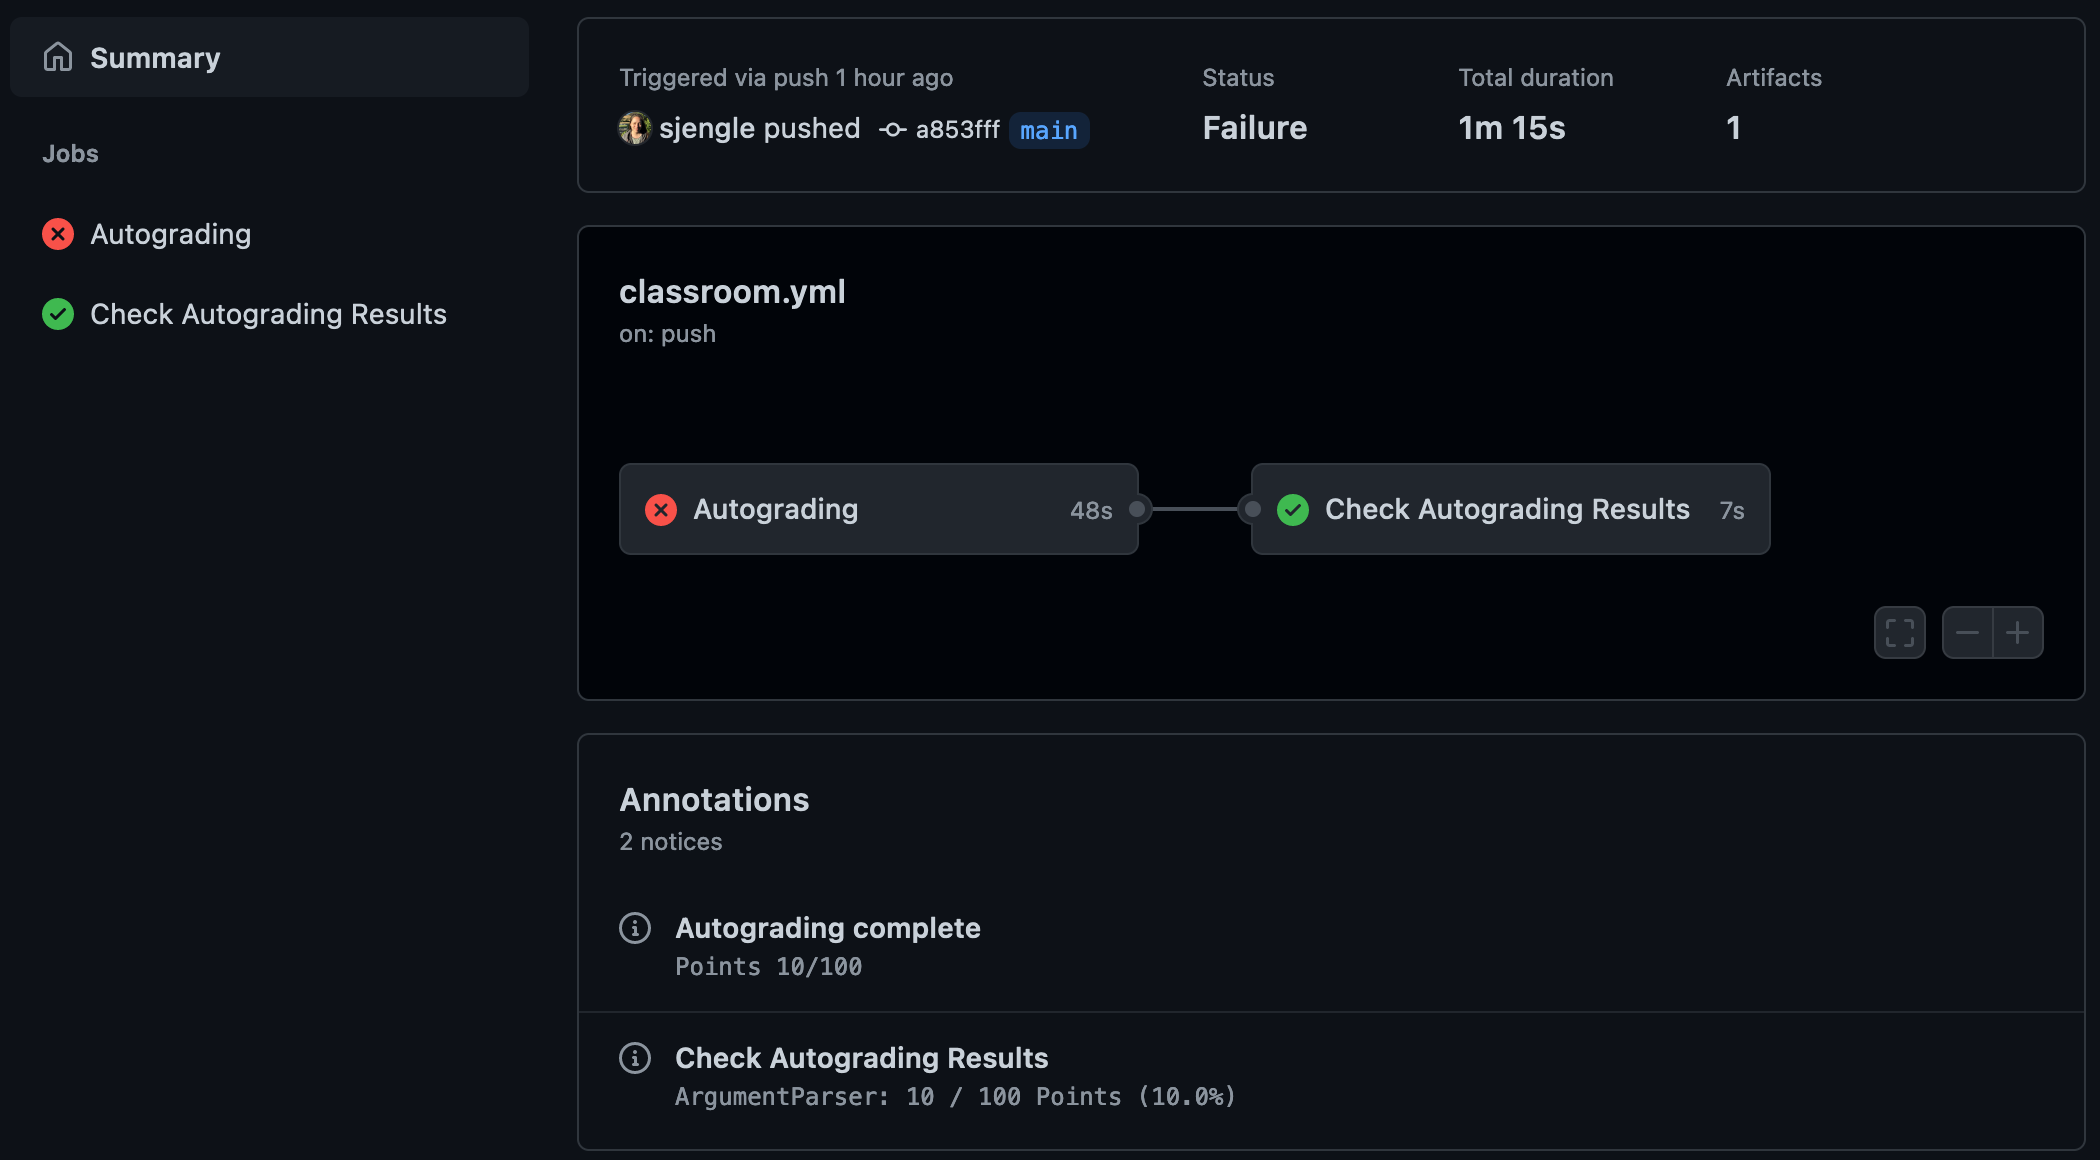
GitHub will often add other warnings here related to the GitHub Actions infrastructure. You can usually ignore those.
-
Click on the “Autograding” action for details on which tests passed or failed. There is a lot of output to scroll through here. For example:
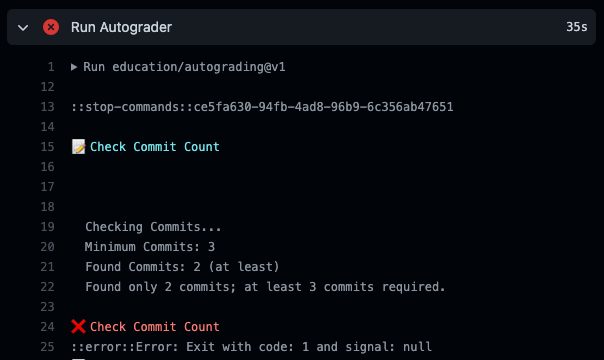
…the “📝 Check Commit Count” heading is the start of that test output. The “❌ Check Commit Count” heading is the end of that output with the status of that test. Everything in between those two headings is the output from Maven for that test.
In this case, the ❌ red “x” means the test failed. You will see a ✅ green checkmark if the test passed.
You can link to a specific line in this autograder run when asking for help on Piazza! For example, here is a link to the autograder run for the ArgumentParser template.